
DIY Spinal Decompression: A Home Remedy
- g2case
- Nov 13, 2025
- 5 min read
Back pain affects millions of people worldwide, often caused by pressure on the spine. Spinal decompression therapy can relieve this pressure, easing pain and improving mobility. While professional treatments exist, many seek safe, effective ways to perform spinal decompression at home. This guide offers practical steps and tips for DIY spinal decompression, helping you support your spine health without expensive equipment or clinic visits.
Understanding Spinal Decompression
Spinal decompression involves relieving pressure on spinal discs and nerves. This pressure can result from herniated discs, spinal stenosis, or general wear and tear. When the spine is compressed, it can cause pain, numbness, or weakness in the back, legs, or arms.
Spinal decompression therapy works by gently stretching the spine, creating negative pressure inside the discs. This encourages retraction of bulging discs and improves nutrient flow, which supports healing.
Professional spinal decompression often uses machines or traction devices. However, certain home techniques can mimic this effect safely when done correctly.
Signs You Might Benefit from Spinal Decompression
Before trying any home remedy, it’s important to recognize symptoms that suggest spinal compression:
Persistent lower back pain that worsens with sitting or bending
Radiating pain or numbness in the legs or arms
Muscle weakness or tingling sensations
Reduced flexibility or stiffness in the spine
If you experience severe pain, sudden weakness, or loss of bladder control, seek medical attention immediately. These could indicate serious conditions requiring professional care.
AMHC'S highly effective DIY Spinal Decompression
Safety is key when performing spinal decompression at home. First, set an appointment at AMHC to review the following with a spinal decompression specialist. AMHC has all the equipment listed and you can try out the AMHC DIY spinal decompression protocols in the AMHC clinic.
To successfully perform your own DIY spinal decompression at home, you will need to purchase or already possess the following items:
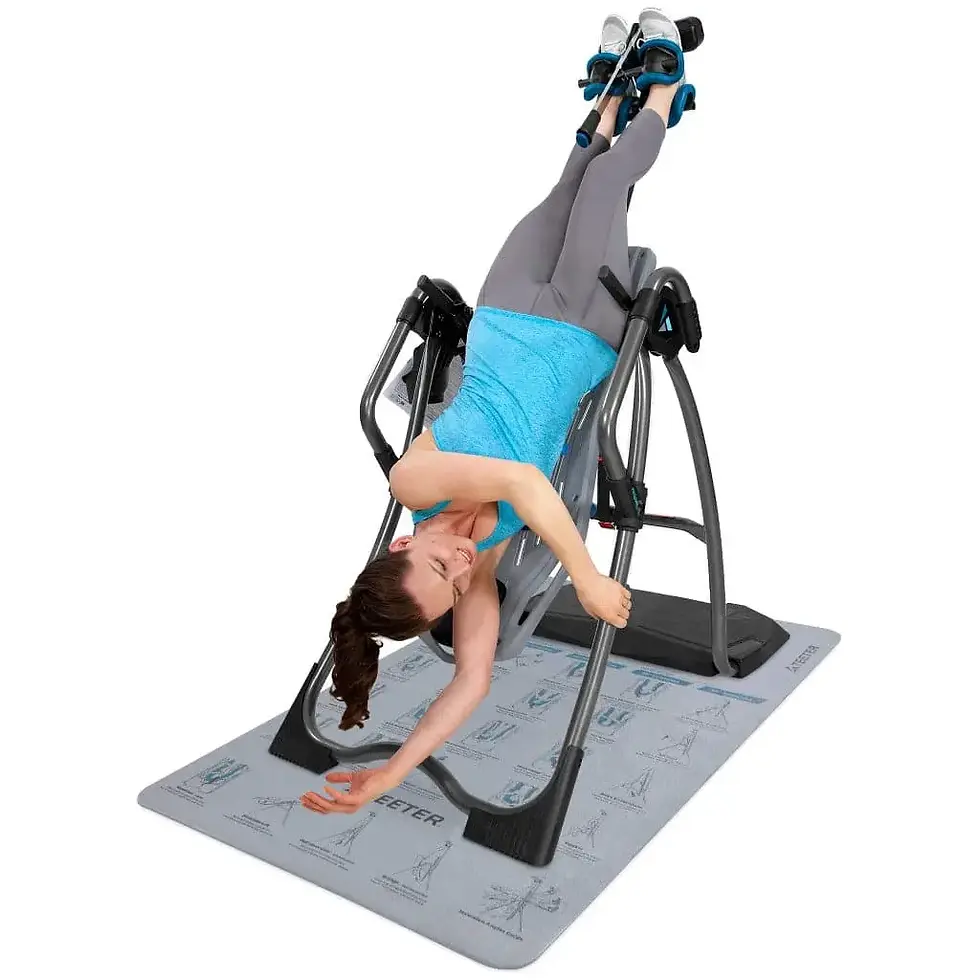
A used "Teeter" or other quality Inversion Table -->> via Craigslist for $75
A decompression back belt similar to Dr Ho's on Amazon,
The one of choice has a red square with a white cross on the front belt >> $40
A hair dyer or heating blanket
A gel based cold pad (not ice)
The precise use of AMHC’s integrated Hot & Cold therapy with DIY spinal decompression is priceless. These protocols have documented 98% success rates with over 800 previous AMHC clients.
Once you have reviewed the AMHC protocols with an AMHC specialist, you will need to make a decision to being taught (or coached) on the actual AMHC protocols by the specialist (as a personal trainer) using the in-office AMHC inversion table.
The cost for the training and learning AMHC's proprietary highly successful protocols is $100 and you can have up to three private training sessions to get it perfect. And any future "tune-ups" are free.
Simple Spinal Decompression Exercises You Can Do at Home
ONLY TWO highly effective exercises are needed that gently stretch and decompress your spine:
#1: AMHC's special "Bug 3-3-3" Lower Back Stretch
This stretch helps relieve lower back tension and decompresses the lumbar spine.
Sit in a chair, like a folding chair, where your knees are bent at 90 degrees.
Sit up straight and let your arms fall to each side of you.
Then, very gently, slowly bend forward, taking a deep breath and letting it out slowly as you bend your upper body forward and down, with the objective of touching your shoulders to your knees. Do not expect to actually touch the knees, it is just the objective. Although, many folks, over time, are able to achieve the objective.
When you start to feel a mild pull (or stretch) in your lower back, hold that position for about 20 seconds. Then slowly return to your upright position.
Remember, the Bug 3-3-3 is a deliberate repetitive mild stretch ! Do not over do it !
Repeat the bending of the lower back & hold, exactly 3 times for this session.
Then repeat the session 3 times each day: morning , noon, and night.
Then repeat 3 days in a row.
That's the 3-3-3 And you are like a Bug bending forward.
After 3 days, you will experience the absence of lower lumbar pain !!
You may decide to make the Bug 3-3-3, your daily routine, since it is mild & easy.
#2. AMHC's off-the-wall stretch
AMHC's secret to spinal health. This stretch will also align your pelvic axis.
Find a wall and about 6 feet clearance from the wall, then stand upright approx. 18 inches from the wall, with your feet spread to shoulder width.
Extend both arms to the wall, straight out, with hands flat on the wall.
If you have arms longer than 18", then push them up the wall until the arms are fully extended.
Now, slightly bend both knees, and kick your right leg backward (away from the wall) as far as you can while still holding your hands on the wall.
While the right leg is extended, set your full foot to the floor, from toes to heal. Make sure your have extended your leg as far back as possible and keep the full foot down.
Hold the leg and foot in place, and work both hands (and arms) up the wall as far as you can, and hold that.
If you have done it right, you will be fully stretched from stem to stern. And your profile, as viewed from the side, will look like a 45 degree angle. Now the fun part begins.
Bend your left knee forward as much as possible to experience a full body stretch. You will feel your calves stretching, you will feel a stretch between your shoulder blades in your back, you will feel your buttocks tighten, and you will feel your arms stretch and your full legs stretch.
RIGHT just once: Hold this right side full body stretch for at least 20 seconds, then switch legs and repeat on the other side.
LEFT just once: Hold the left side full body stretch for at least 20 seconds, then come back to starting position.
If you did it right, you put enough pressure on the pelvis on each side, to make the pelvis align properly, and get rid of a pelvic tilt.
In addition, you forced the alignment of your spine from two different sides. No matter where it was before, it is now more properly aligned.
Some of my clients, call this the magic stretch. And when done, with just the one rep of each leg, your body feels invigorated and is smiling from head to toe.
DO NOT DO THE FOLLOWING, unless you are an exercise junkie. But if you are a normal person who occasionally does exercise and stretching, do NOT do the following:
3. Any other PELVIC exercises are not necessary. The AMHC "off-the-wall" stretch does it perfectly for you.
4. Do NOT Hang from a Bar - when you are not in perfect physical shape, hanging 90 degrees will injure your back.
It is too much for a weak back.


Comments